


| Original URL: | https://blogs.technet.microsoft.com/xdot509/2013/03/07/installing-a-two-tier-pki-hierarchy-in-windows-server-2012-part-vii-enabling-ssl-on-the-web-enrollment-website/ |
| Post name: | Installing a Two Tier PKI Hierarchy in Windows Server 2012: Part VII, Enabling SSL on the Web Enrollment Website |
| Original author: | chdelay |
| Posting date: | 2013-03-07T04:42:18+00:00 |
In this installment of this blog series, I will cover enabling SSL on the Web Enrollment website. If you are new to Active Directory Certificate Services this blog will also give you an idea of what’s involved in issuing certificates.
Duplicating the Web Server Certificate Template
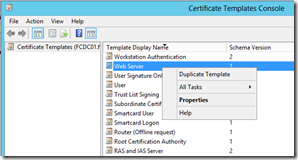
A best practice is to duplicate Certificate Templates instead of using the Out-of-box templates. This allows you to retain the original templates, without modification. So, the first step for me to perform is to duplicate the Web Server Certificate Template. In order to do this I open up the Certificate Templates Console. Then I right-click on the Web Server template and select Duplicate Template from the context menu.
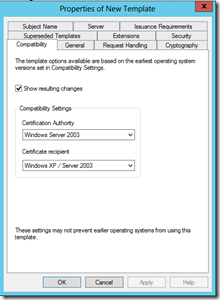
In Windows Server 2012 you will first be presented with the Compatibility tab. The idea is that you select the OS Version of your Certification Authority and the OS Version of clients that will be enrolling for certificates based on this template. This will then only allow you to select options in the Certificate Template that are supported by both the CA and the client/enrollee. In my example, I am going to leave the defaults.
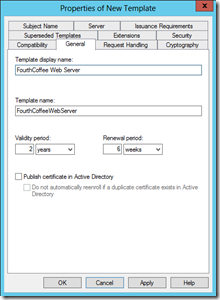
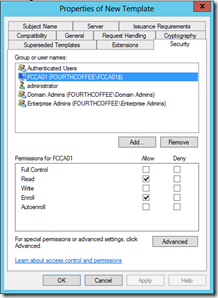
Next I am going to name the Certificate Template FourthCoffee Web Server.
Next, I have to give the CA the proper permissions for the template, so that it can enroll for a certificate. On the Security tab, click on Add…
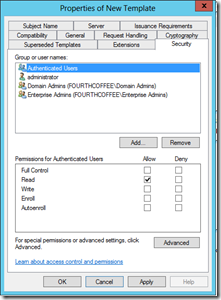
I then ensure that Computers is selected under Object Types…, type the CA name, click Check Names, and then click OK.
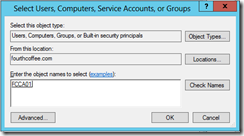
Finally, I click OK.
Enabling the Certificate Template on the CA
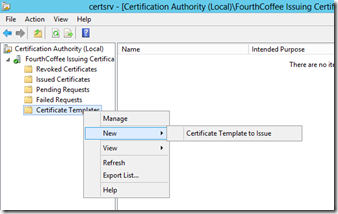
So, now the CA has proper permission to the Certificate Template. Next, I have to make the Certificate Template available on the CA. So, I open up the Certification Authority Console (certsrv.msc). I then right-click on Certificate Templates, select New, then Certificate Template to Issue.
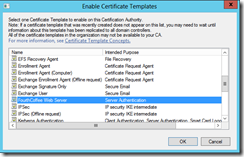
Then I select FourthCoffee Web Server, and click OK.
Enrolling for the Certificate
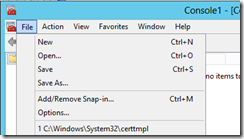
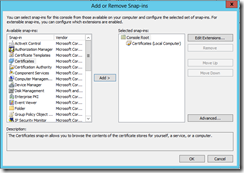
I could enroll for the Certificate through IIS. However, I prefer to use the Certificates MMC as that gives me more control over the configuration of my request. So, I type MMC.exe and press Enter. Then on the MMC Console, I select File then Add/Remove Snap-in…
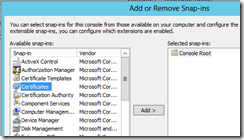
From the Add or Remove Snap-ins selection tool, I select Certificates, and click Add.
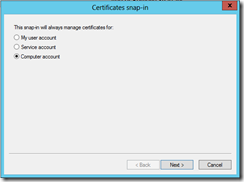
I then select Computer account, and click Next.
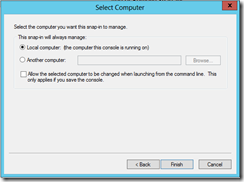
Then on the Select Computer page of the wizard, I select Local Computer, and click Finish
I then click OK to complete this task.
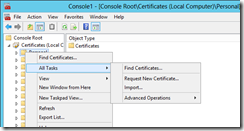
Next, I expand Certificates (Local Computer), right click on Personal, select All Tasks, and then Request New Certificate…
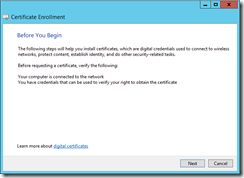
Now, the Certificate Enrollment wizard opens, and I click Next.
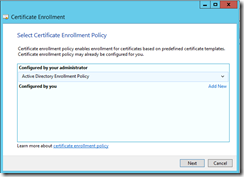
On the Certificate Enrollment page of the wizard, I click Next.
On the Request Certificate page of the Wizard, I select the Check Box to choose FourthCoffee Web Server. I then, click on Details, and then the Properties button.

Under Alternative Name, on the Subject Tab, I change the Type to DNS.
Next I type the short name of the CAs machine name, under Value, and click Add. I then perform the same step for the FQDN of the CAs machine name. I click Apply, and then click on the General tab.
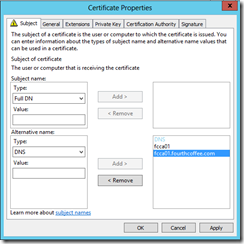
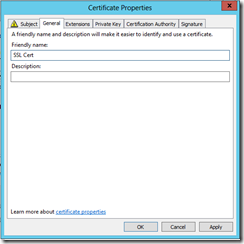
I type SSL Cert under friendly name. I will later use this name to identify the appropriate certificate. Then I click OK.
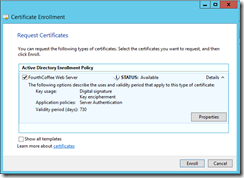
Next on the Request Certificates page of the wizard, I click Enroll.
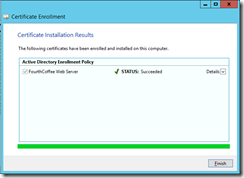
After I successfully enroll for the certificate, I click Finish.
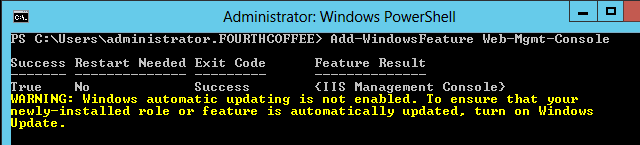
Installing IIS Administration Console
At this point I realized that did not have the IIS Administration tools installed (Oops!). To install the IIS Administration tools I ran the following PowerShell command: Add-WindowsFeature Web-Mgmt-Console.
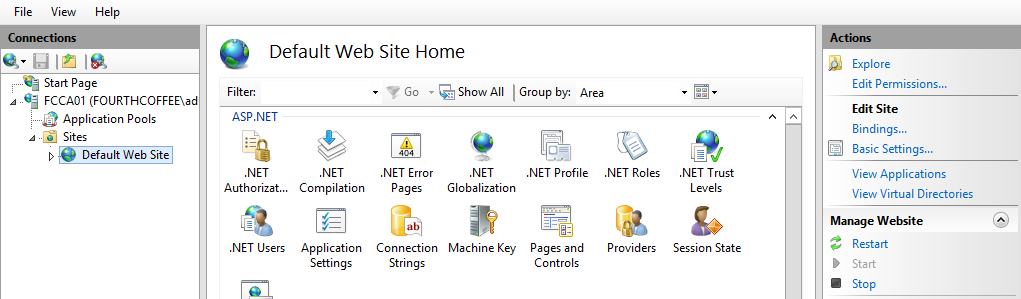
Configuring IIS
Now that I have the IIS Administration Console installed, I open the console. I expand the Server Name node, then expand the Sites node and click on Default Web Site. In the Actions pane I click on Bindings…
In the Site Bindings windows, I click Add…
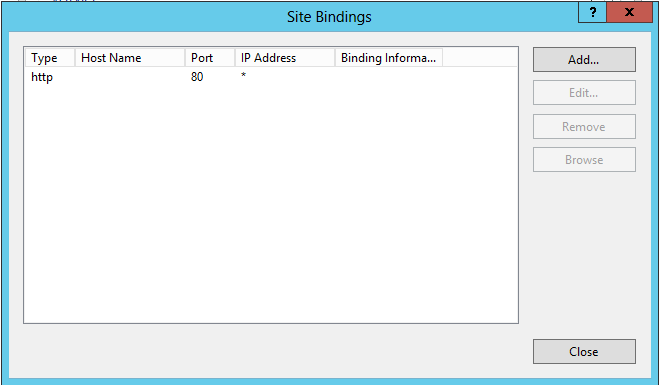
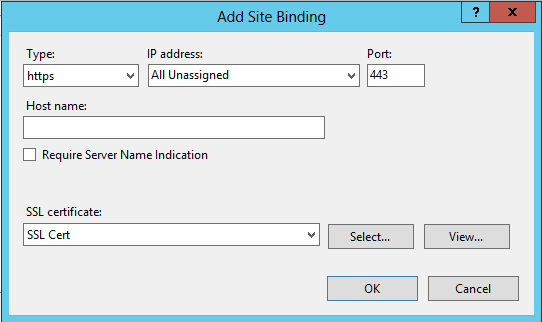
In the Add Site Binding window, I select https from the Type drop-down. Then under SSL certificate I chose SSL Cert, and finally click OK. Then I click Close to close the Site Bindings window.
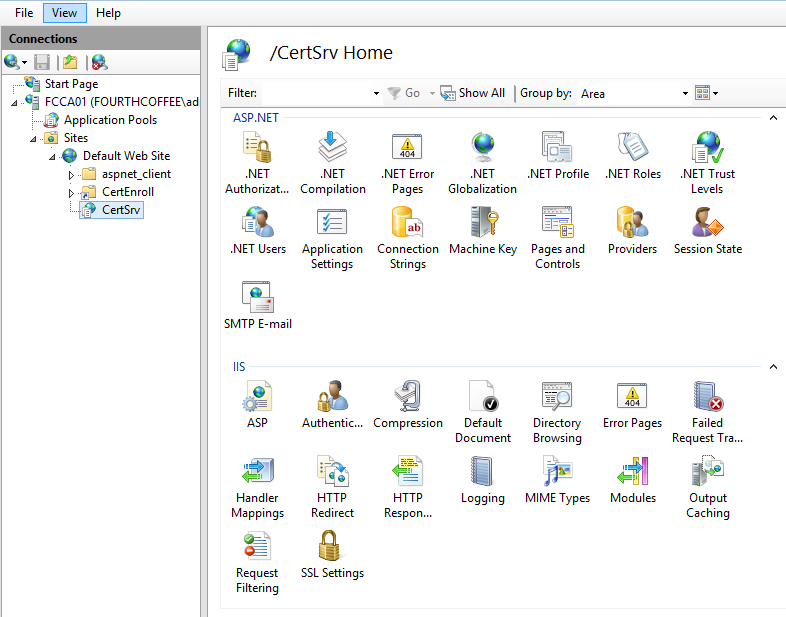
I then expand the Default Web Site, and click on the CertSrv virtual directory. Next, I double-click on SSL Settings.
Under SSL Settings, I select Require SSL, then I click the Apply link in the Actions pane.
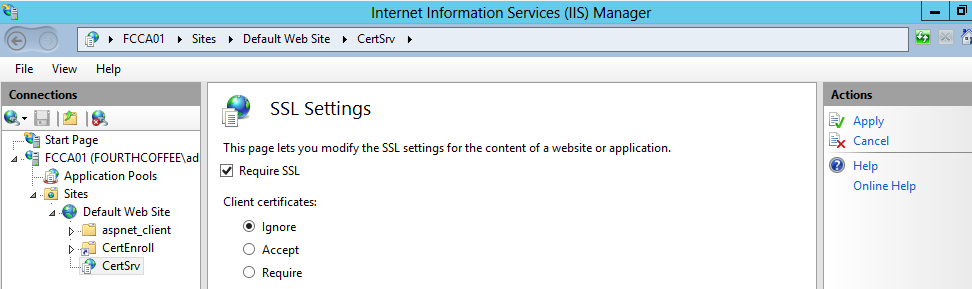
Now the Web Enrollment site is configured with SSL.
Conclusion
I have now configured SSL on the Web Enrollment website. The next step for me to take is to perform some security configuration on both CAs to reduce the attack surface, and secure my shiny new PKI.
Comments: