


| Original URL: | https://blogs.technet.microsoft.com/xdot509/2013/08/12/getting-started-with-windows-azure-part-5-getting-familiar-with-the-windows-azure-management-tools-for-virtual-machines/ |
| Post name: | Getting Started with Windows Azure: Part 5 Getting Familiar with the Windows Azure Management Tools for Virtual Machines |
| Original author: | chdelay |
| Posting date: | 2013-08-12T13:43:40+00:00 |
Now, that we have created our first VM we want to get familiar with the Management Tools. For the purpose of this blog posting, I will be covering the Management Tools presented by the Web Interface. Specifically, I will be covering the management tools for Virtual Machines.
Once you login to Windows Azure (https://manage.windowsazure.com) you will be presented with the management website. This website has tools for managing both Windows Azure Platform as a Service (PaaS) and Windows Azure Infrastructure as a Service (IaaS). I will be focusing on tools used to manage Windows Azure VMs in other words Windows Azure IaaS.
Note: I have obscured some personal/private information in the screenshot below for security reasons.
After you create your first VM, click on All Items
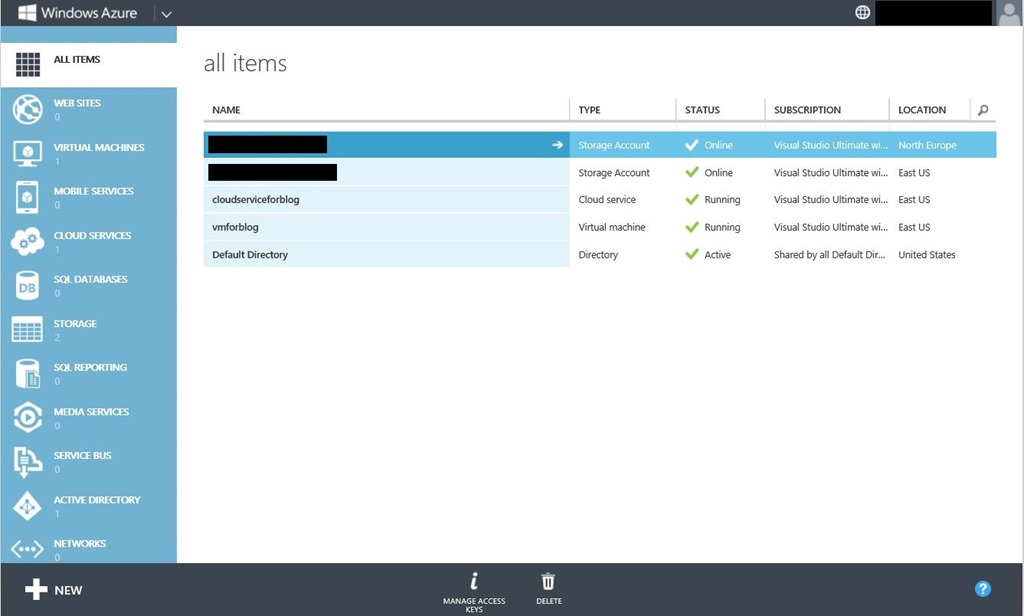
You will notice a number of items that were created when you created your first VM.
Storage Account: There is a storage account created to stored the Virtual Disks created by your VM. This same Storage Account will be used every time you create storage in that same region. If you install VMs in multiple regions you will see multiple storage accounts.
Cloud Service: There is a cloud service created. A cloud service is a logical container that originated with Windows Azure PaaS. If you want to create multiple VMs and make it easier for them to communicate with each other you can install them in the same Cloud Service. You can also configure Virtual Networks to accomplish this as well.
Default Directory: This refers to the Windows Azure Active Directory (WAAD) you can leverage for authentication.
Virtual Machines
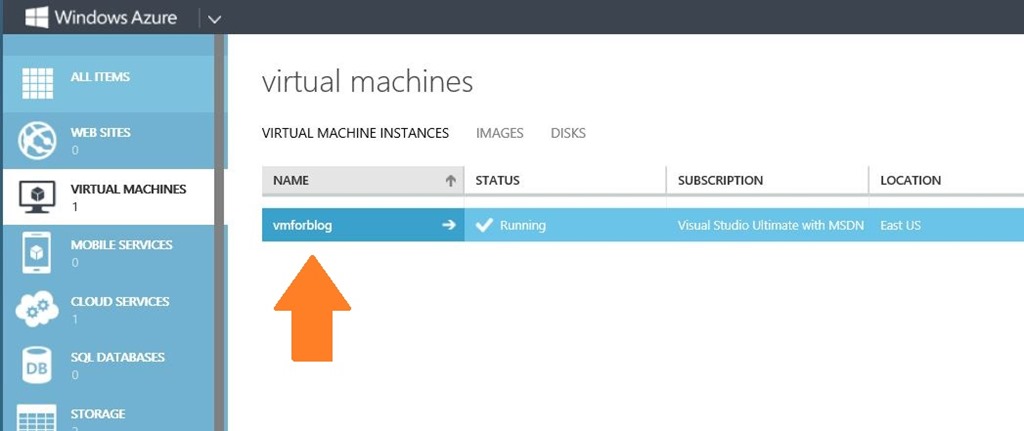
Next, if you click on your Virtual Machines you will see a listing of VMs you have created.
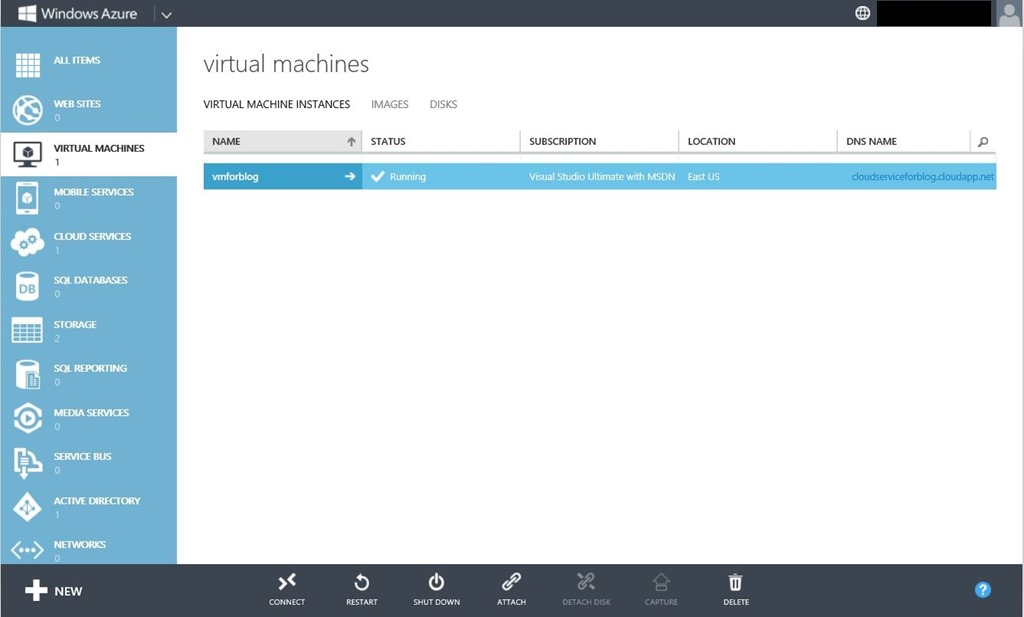
You will see a menus at the bottom of the screen that provides a number of options.

CONNECT: Allows you to connect to the Virtual Machine via RDP.
RESTART: Restart the OS for the selected VM
SHUTDOWN: Shutdown the OS for the selected VM.
ATTACH: Attach a Virtual Disk to the VM.
DETACH DISK: Detach a Virtual Disk from the VM.
CAPTURE: Allows you to capture an image of the VM, that can be used to create new VMs.
DELETE: Delete the selected VM.
Virtual Machines Menu
There is also a menu at the top of the screen.
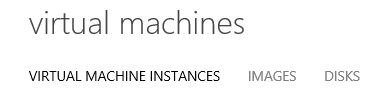
Virtual Machine Instances
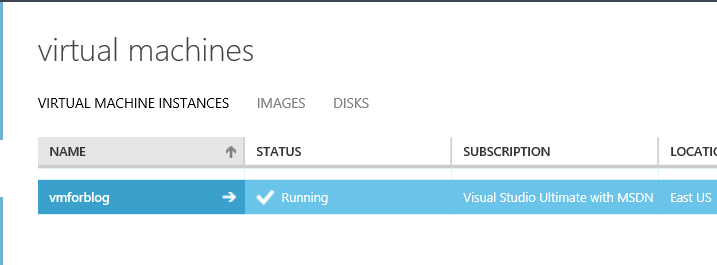
By default Virtual Machine Instances are selected. When Virtual Machine Instances is selected you see a list of your VMs.
Images
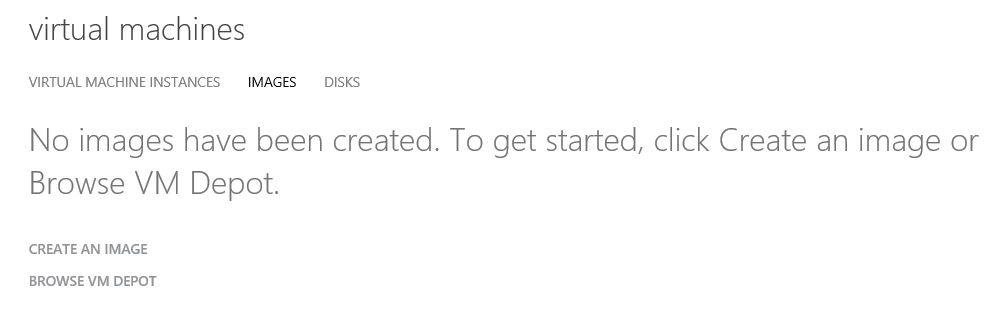
If you select a Images you will see a list of images. Images are used for creating new Virtual Machines. From this screen you can also create an image or import an image from the VM Depot.
CREATE AN IMAGE
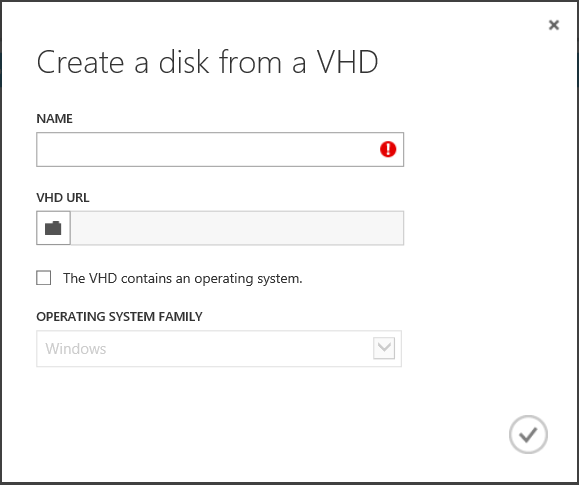
If you select CREATE AN IMAGE you can import an image from VHD as seen below.
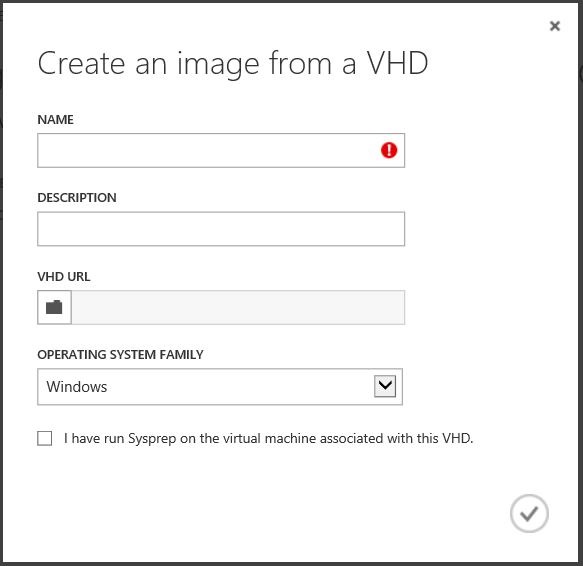
In order to create an image you must have previously uploaded a VHD to your Windows Azure Storage Account.
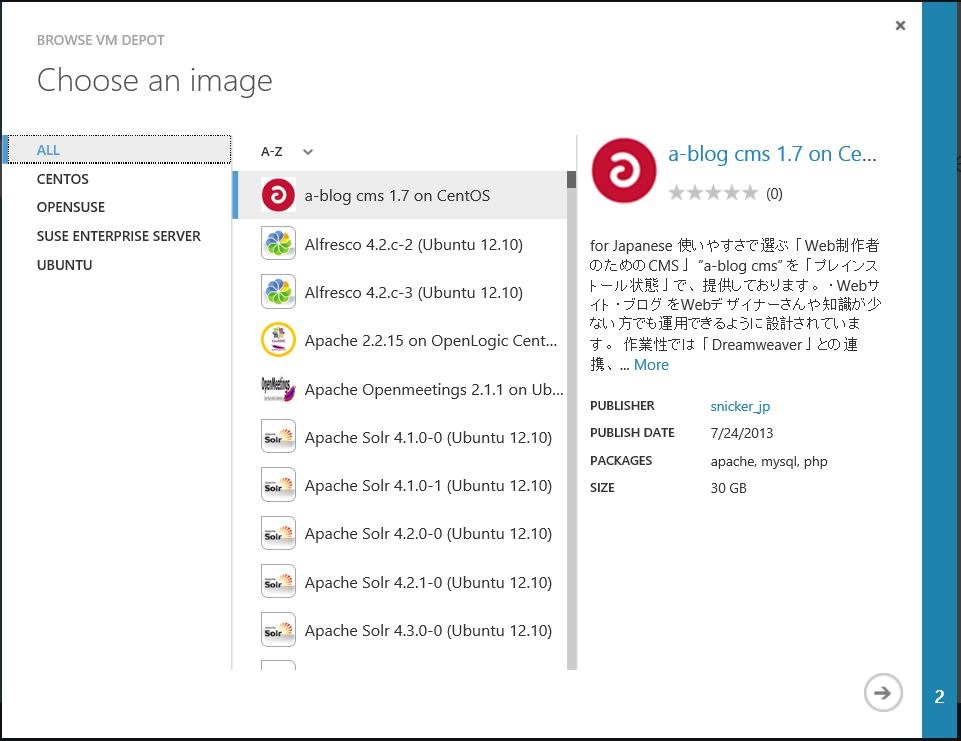
BROWSE VM DEPOT
The VM Depot is a community drive location where individuals can upload images they have created. If you would like to create a image based on an OS or configuration that is not available and Windows Azure you can look in the VM Depot to see if someone has already created an image that meets your needs.
Disks
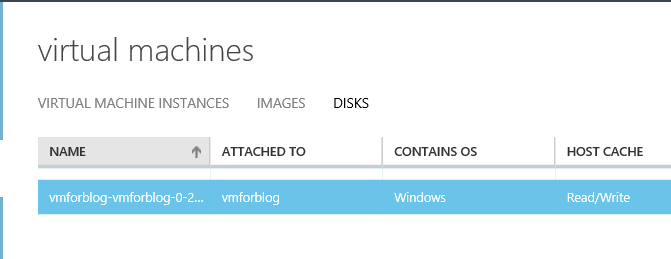
If you click on DISKS you can view your Virtual Disks. There are also 3 options in the menu at the bottom of the screen: CREATE, EDIT CACHE, and DELETE.

CREATE
Create allows you to create new Virtual Disk from an existing VHD.
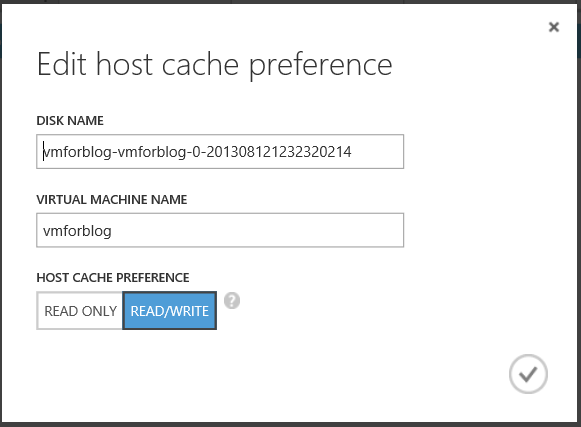
EDIT CACHE
Edit Cache allows you to modify whether caching applies to reads or reads and writes.
DELETE
Delete allows you to delete the selected Virtual Disk.
Virtual Machine Advanced Configuration
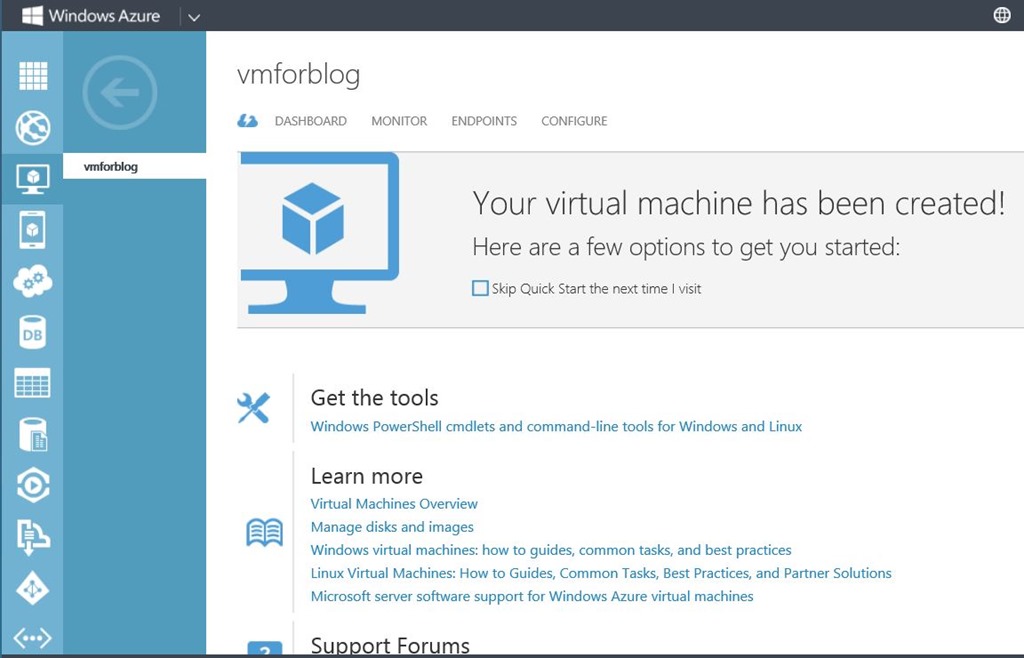
If you click on the Virtual Machine name, it will take you to a page that provides additional information, monitoring, and configuration options.
After clicking on the Virtual Machine name you will be presented with a page that displays a number of resources including links to tools, support, and learning resources.
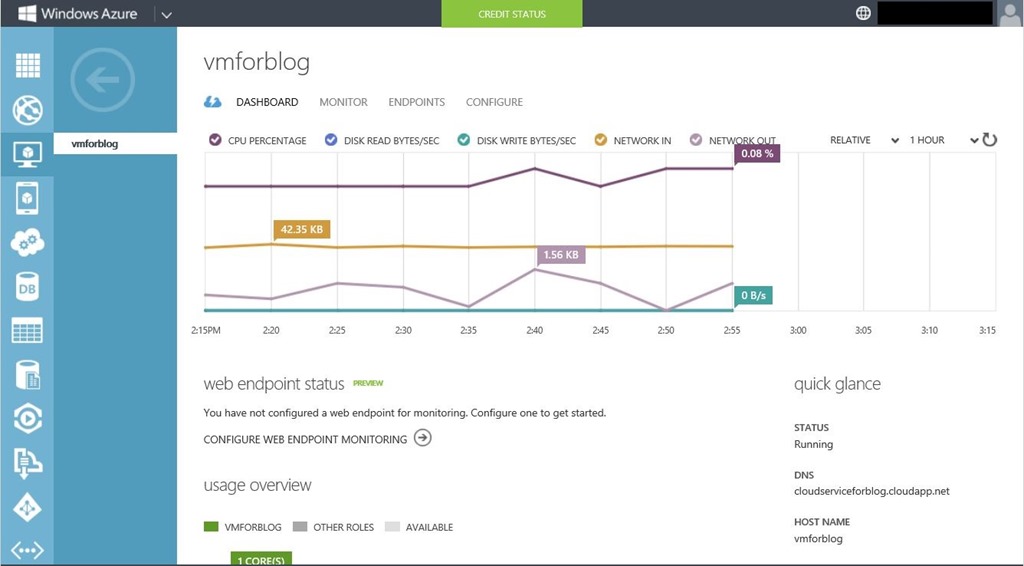
Dashboard
If you click on DASHBOARD you will be able to view basic monitoring and information about the Virtual Machine.
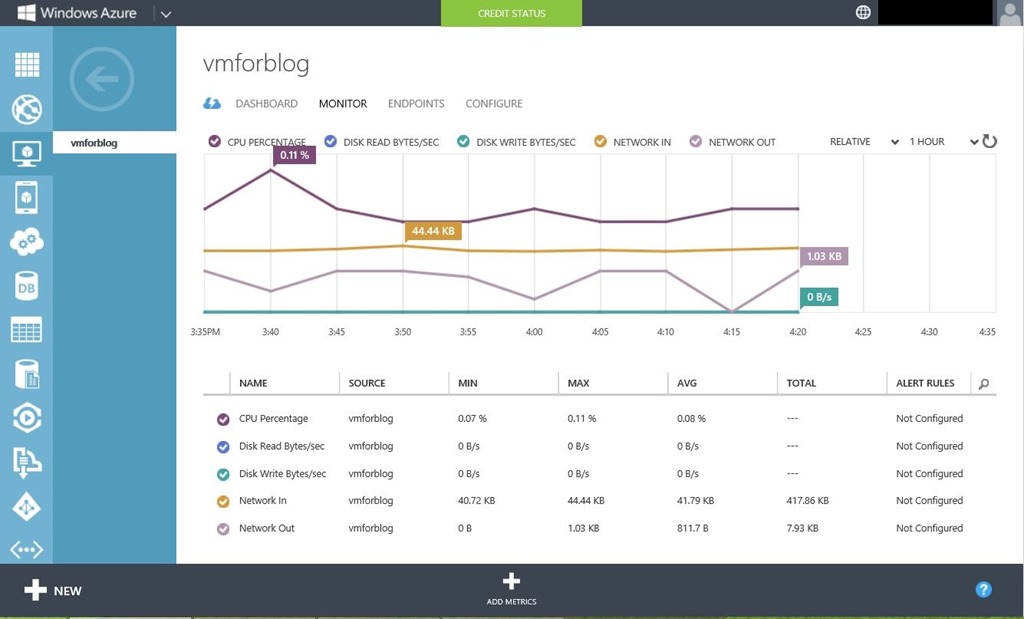
Monitor
If you click on Monitor you will see the amount of resources used by the Virtual Machine. The specific resources that can are monitored are CPU, Disk, and Network usage.
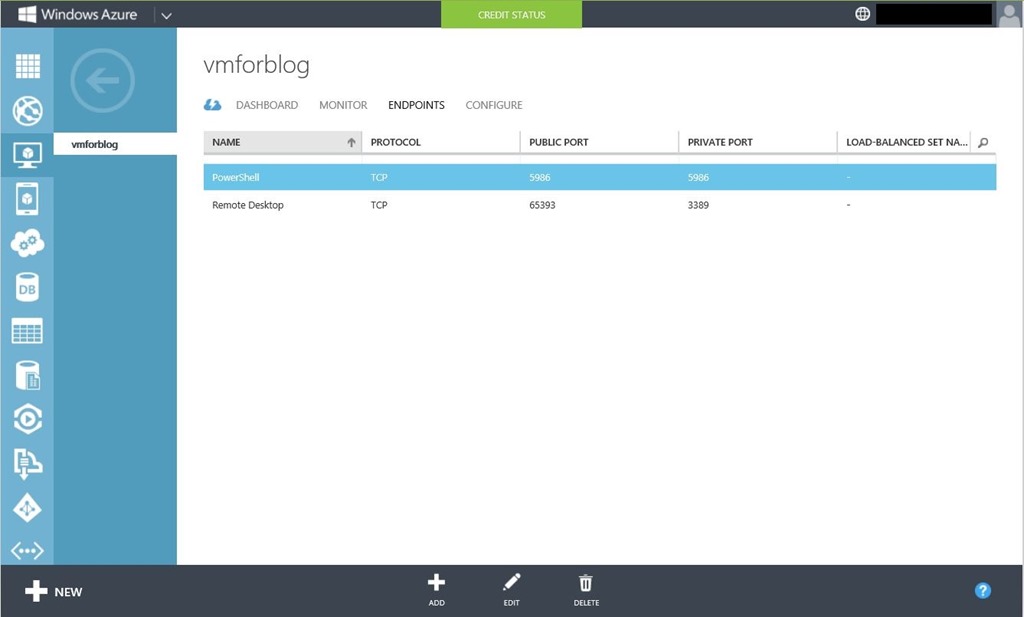
Endpoints
From the Endpoints page you can Add, Edit, and Delete endpoints. The Endpoints page allows you to map external facing ports to the ports on the Virtual Machine. For example after creating a virtual machine ports for RDP and PowerShell are available over the internet and mapped to a port on the Virtual Machine.
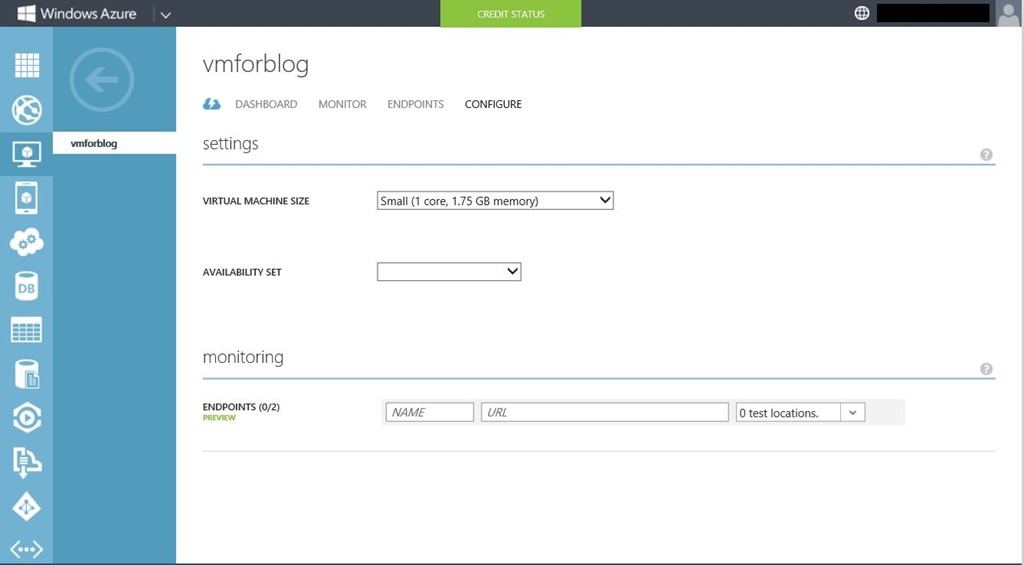
Configure
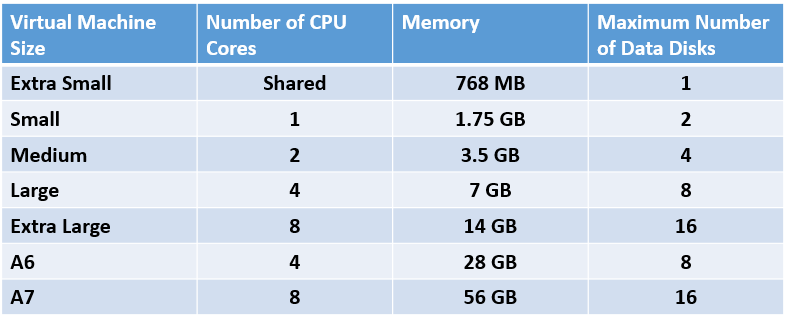
The configure page allows you to change the Virtual Machine Size. Of course pricing is based on Virtual Machine Size, so changing the size will effect the cost. The Virtual Machine sizes that are currently available are listed in the table below:
On the configure page you can also add the virtual machine to an availability set. An availability set provides high availability for a Virtual Machine. When you VMs to an availability set, the Virtual Machines are located in different fault domains to minimize downtime.
Summary
The purpose of this blog posting was to cover the management interface for Windows Azure, specifically for Virtual Machines. There is much more in the way of management tools available, for managing things like networking, storage, Windows Azure Active Directory, and more. I will be covering these additional management tools in upcoming blog postings, in addition to proving more detail on the management tools I covered in this blog posting.
Comments: