


| Original URL: | https://blogs.technet.microsoft.com/xdot509/2013/07/30/getting-started-with-windows-azure-part-3-creating-your-first-windows-azure-vm/ |
| Post name: | Getting Started with Windows Azure: Part 3 Creating Your First Windows Azure VM |
| Original author: | chdelay |
| Posting date: | 2013-07-30T18:18:27+00:00 |
In the previous two blog postings (Getting Started with Windows Azure: Part 1 Introduction and Getting Started with Windows Azure: Part 2, What are Cloud Services?) I discussed how to get a Windows Azure Trial account as well as some background information on cloud computing and Microsoft’s Cloud Services. In this blog posting I am going to talk about how to get started with Windows Azure IaaS. I am going to cover some basics and how to create your first Virtual Machine in Windows Azure IaaS.
Once you have your Azure Trial setup you can login to your account here: https://account.windowsazure.com/Home/Index

So, let’s create are first Virtual Machine!
The steps I am going to cover for creating your first Virtual Machine are very basic and just to get you familiar with Windows Azure IaaS and the management portal. Eventually, you are going to want to become more familiar with managing Networks, Storage, and Cloud Services. I will cover these topics in upcoming blog posts. We will also eventually cover how to import your own Virtual Machines and how to connect your On Premise network to Windows Azure.
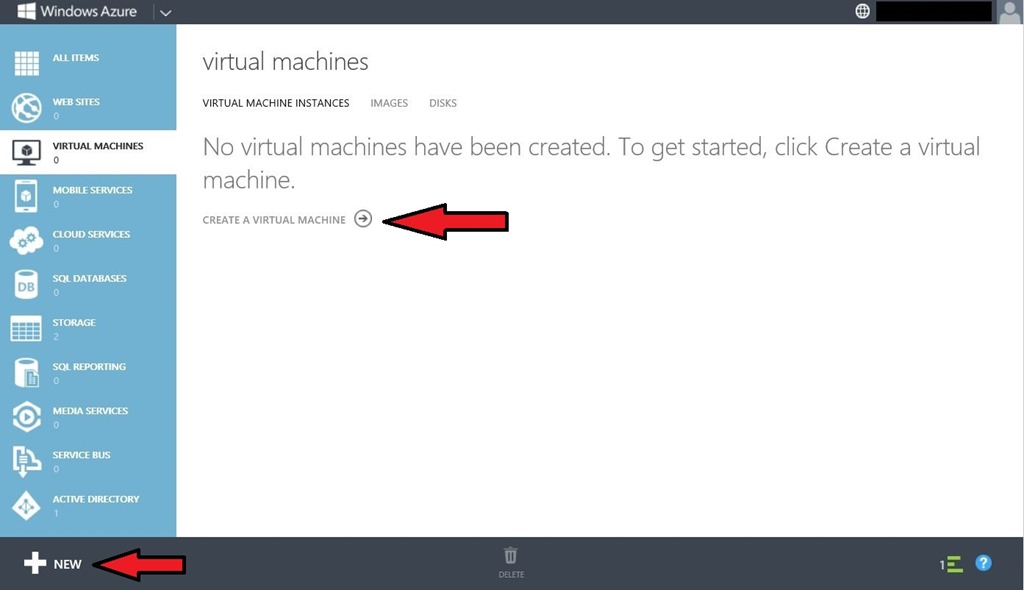
To create your first Virtual Machine you can either click on CREATE A VIRTUAL MACHINE or + NEW.
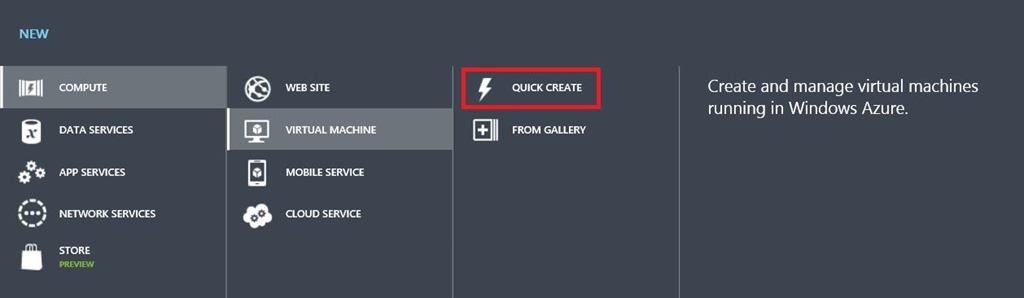
This will bring up a menu. You have to options Quick Create or From Gallery. I would recommend for your first Virtual Machine that you choose Quick Create.
This will open a form you can fill out to create the Virtual Machine.
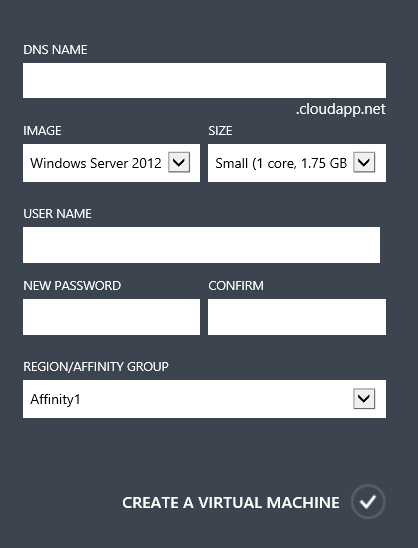
DNS Name: You will need to create a DNS Name. This DNS name bust be unique in the coudapp.net namespace.
Image: You will have to select an OS image.
At the time of writing this blog posting the following Platform Images are available:
-Windows Server 2012 Datacenter
-Windows Server 2012 R2 Preview
-Windows Server 2008 R2 SP1
-Sharepoint Server 2013 Trial
-SQL Server 2014 CTP1 Evaluation Edition On Windows Server 2012
-SQL Server 2014 CTP1 Evaluation Edition On Windows Server 2012 R2
-SQL Server 2012 SP1 Enterprise On Win2012
-SQL Server 2012 SP1 Enterprise On Win2K8R2
-SQL Server 2012 SP1 Standard On Win2012
-SQL Server 2012 SP1 Standard On Windows Server 2008 R2 SP1
-SQL Server 2012 SP1 Web On Windows Server 2008 R2 SP1
-SQL Server 2008 R2 SP2 Enterprise Windows Server 2008 R2 SP1
-SQL Server 2008 R2 SP2 Standard Windows Server 2008 R2 SP1
-BizTalk Server 2013 Enterprise
-BizTalk Server 2013 Evaluation
-BizTalk Server 2013 Standard
-Visual Studio 2013 Ultimate Preview
-openSUSE 12.3
-SUSE Linux Enterprise Server 11 SP2
-SUSE Linux Enterprise Server 11 SP3
-Ubuntu Server 12.04 LTS
-Ubuntu Server 12.10
-Ubuntu Server 13.04
-OpenLogic CentOS 6.3
Size: You need to choose the size of your Virtual Machine from a Processor and Memory perspective. This is very important for two reasons. First you want to size the machine appropriately to handle the workload. Second, the pricing differs by the size. And even if you are using a trial account you only have so much in terms of credits to use during the trial. You can use the Pricing Calculator to determine pricing: http://www.windowsazure.com/en-us/pricing/calculator/.
The options you have for sizing at this time, are:
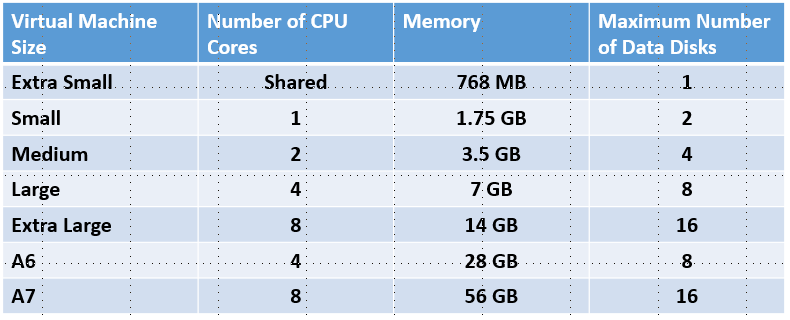
Reference: http://msdn.microsoft.com/en-us/library/windowsazure/dn197896.aspx
New User Name: The name of the local user account you would like to create.
New Password: The password for the local user account you would like to create.
Region/Affinity Group: Then you will need to choose a Region or Affinity Groups. The current region options are:
-North Europe
-West Europe
-East US
-West US
-Southeast Asia
-East Asia
When finished select CREATE A VIRTUAL MACHINE.
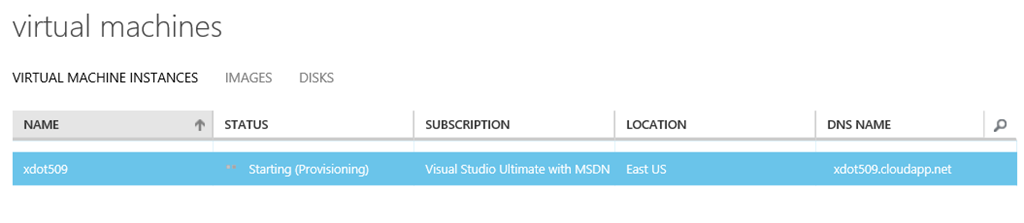
Once you create the Virtual Machine it will take a few minutes to provision.
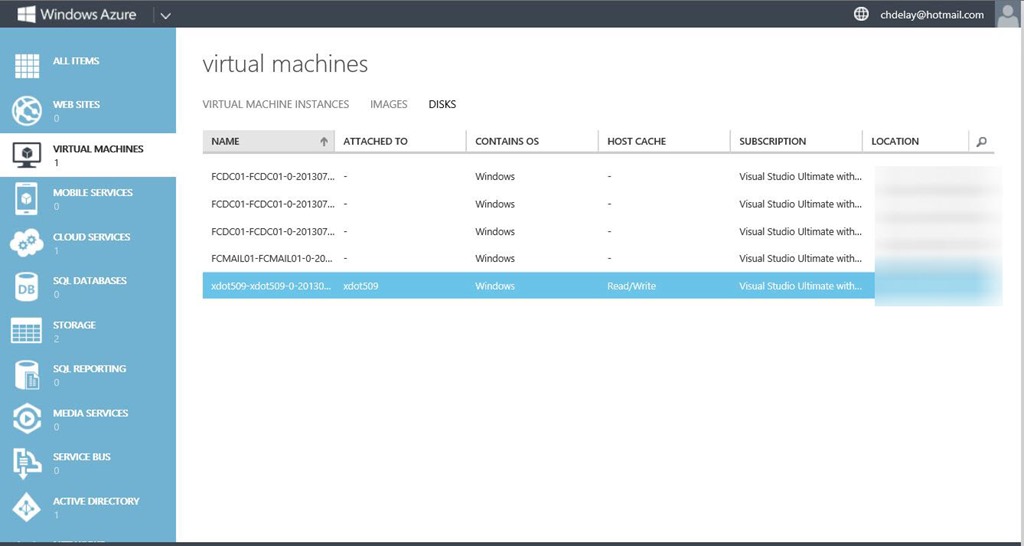
Once it is created you can view the disk that was created click on Disks.
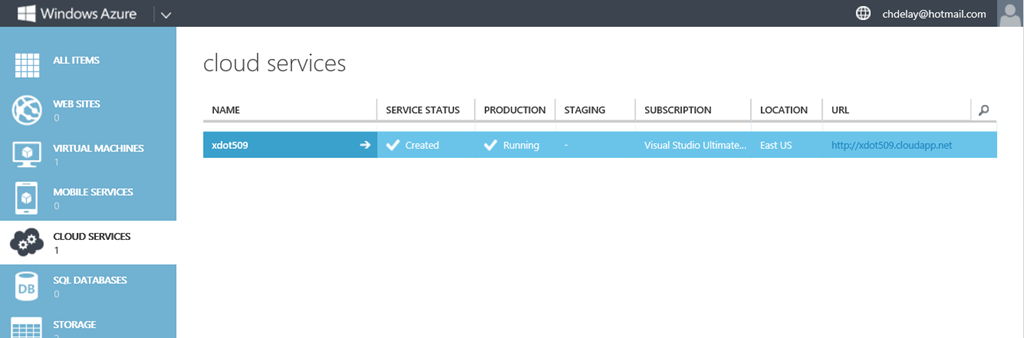
When you create your first virtual machine it also creates a Cloud Service. A Cloud Service is a logical and a network boundary.
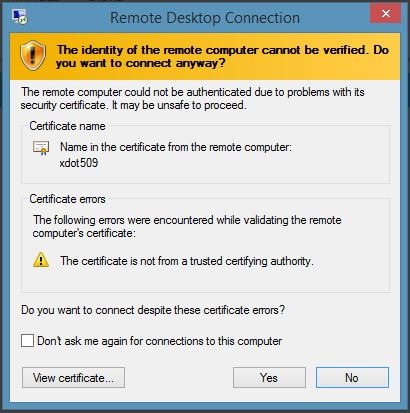
After your VM has been created, you can connect to it by clicking the CONNECT link.
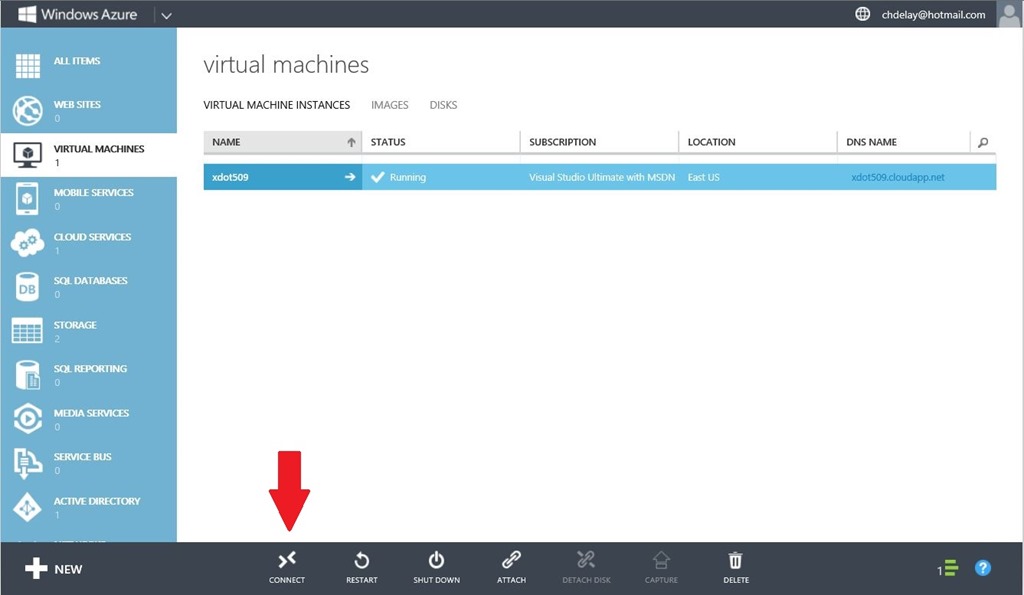
You will then be prompted on an RDP file.

You can then Connect via RDP.
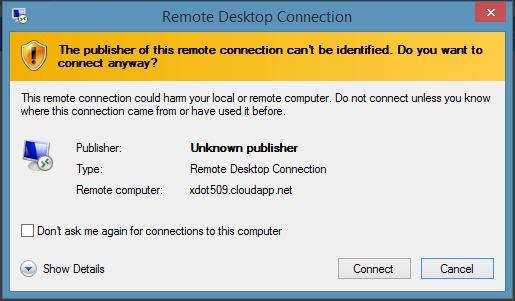
You will be prompted for credentials. Those credentials are created when you provision the VM. You will then be prompted to acknowledge a certificate error, by clicking the Yes button.
Voila!!! You have created your first Azure IaaS Virtual Machine.
Comments: