| Original URL: | https://blogs.technet.microsoft.com/xdot509/2013/03/08/installing-a-two-tier-pki-hierarchy-in-windows-server-2012-part-viii-pki-security/ |
| Post name: | Installing a Two Tier PKI Hierarchy in Windows Server 2012: Part VIII, PKI Security |
| Original author: | chdelay |
| Posting date: | 2013-03-08T15:59:24+00:00 |
So, now that we have walked through configuring our Windows 2012 based PKI, let’s discuss securing this new environment.
Security Considerations for a Root CA
So, we setup a Root CA. A best practice for a PKI is to have the Root CA Offline. In other words the Root CA should never be connected to a network. Back when I started supporting PKI, the use of Virtual Machines was very limited. When an organization would setup an Offline Root it would typically be on a server in the Datacenter, that was not connected to a network. Sometimes, organizations would take the additional step of removing the Hard Drives from the servers and storing them in a locked cabinet or safe.
Today, the landscape has drastically change. Organizations virtualize every system they can. Virtualization has allowed organizations control cost, by in many cases reducing the amount of hardware that needs to be purchased and maintained. As such we see customer’s increasingly virtualizing Certification Authorities, including Root CAs.
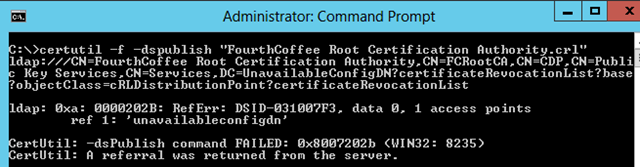
So, what steps can be done to secure virtualized Root CAs? Well, disconnecting the virtual adapter would be the first step in securing the CA. If your virtualization allows you to remove or not connect an adapter, that would be a good strategy as well. The nice thing about Virtualization Software in this type of situation is although the network adapter is disconnected you can still connect to the console via the Virtualization Software. The downside is to copy updated files such as a CRL is a very manual process. In other words you have to take several steps such as mounting a virtual floppy, copying the new CRL file on to the Virtual floppy, and then mounting that Virtual Floppy to a system where you can publish the CRL to the CDP repositories.
Also, if you are going to use a Hardware Security Module (HSM) with a virtual CA, then you will need a network based HSM. It is generally recommended that use an HSM with any type of CA as it protects the Private Key of the CA. However, as with any security measure you will need to perform risk analysis to determine if the purchase of an HSM is justified. In some cases, where you are using certificates with a 3rd party or subordinating your CA to a 3rd Party CA, the use of an HSM may be required.
Additionally, to secure your CA there are some basic security configuration that is recommended. This included ensuring that Auditing is enabled on the CA. In the previous blogs articles I configured CA Auditing using the command: certutil –setreg CA\AuditFilter 127. However, Audit Object Access also has to be enabled. Since the Root CA is not connected to a network, it obviously does not participate in Active Directory. Therefore configurations such as Password Policies that are normally configured via Group Policy have to be done manually. We also recommend configuring the CA so that the last logged on user is not displayed and that AutoPlay is disabled.
- In the following steps I will:
- Disable the network adapter
- Enable auditing for Object Access
- Set the Password Policy
- Disabling displaying the last logged on user
- Renaming the Administrator Account
- Disabling AutoPlay
Disable the network adapter
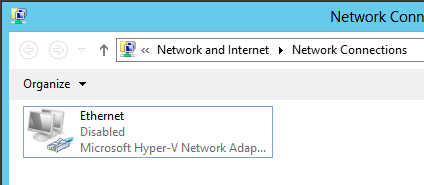
To disable the network adapter open the Network and Sharing Center, click on Change Adapter Settings. Then right click on the adapter and select Disable.
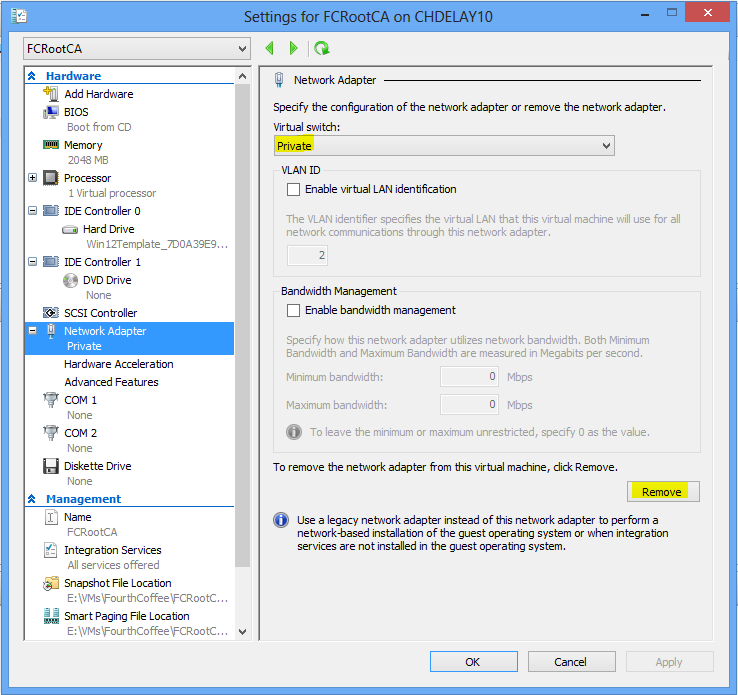
In Hyper-V you can choose to use a Private adapter or Remove the adapter altogether.
Enable auditing for Object Access
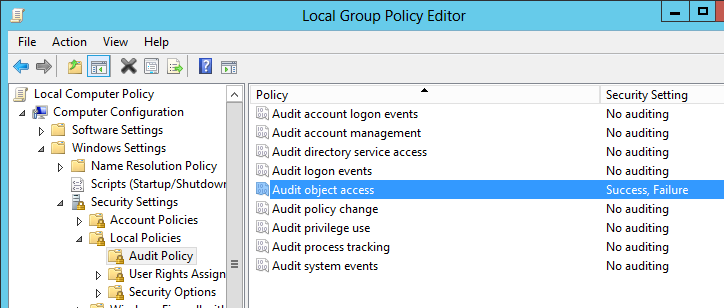
Open GPEDIT.MSC. Expand Computer Configuration > Windows Settings > Security Settings > Local Policies. Double-click on Audit Object Access, on the Properties page, select Success and Failure, and click OK.
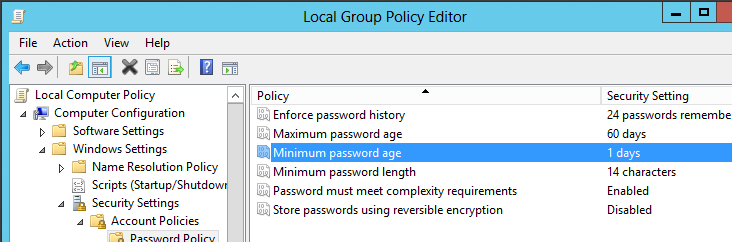
Set the Password Policy
Again, since the Root CA is Offline it is not a domain member and hence will not receive Group Policy. Therefore, you need to manually configure the password policy. To configure the password policy open the Local Group Policy Editor (GPEDIT.MSC) on the Root CA. Expand Computer Configuration > Windows Settings > Security Settings > Password Policy. I configured the Microsoft recommend configuration which is:
- Enforce password History: 24 passwords remembered
- Maximum password age: 60 days
- Minimum password length: 14 characters
- Password must meet complexity requirements: Enabled
- Store passwords using reversible encryption: Disabled
Disabling displaying the last logged on user
Another recommended security configuration that is recommend is to suppress displaying the last logged on user at login. If you are going to configure this setting, you should also rename the Administrator account, as the default name if trivial to guess. To disable displaying the last user name, open GPEDIT.MSC, and expand Computer Configuration > Windows Settings > Security Settings > Local Policies > Security Options. Next set Interactive logon: Do not display last user name to Enabled.

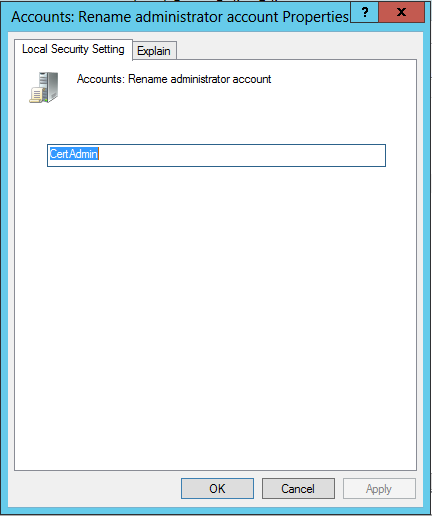
Renaming the Administrator Account
Open GPEDIT.MSC, and expand Computer Configuration > Windows Settings > Security Settings > Local Policies > Security Options.
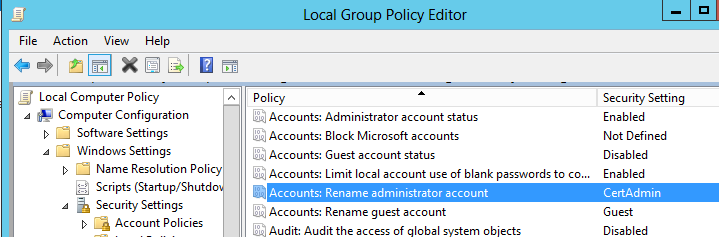
Double-click on Accounts: Rename administrator account, enter the desired name of the Administrator account on the Properties page, and click OK. In my example I used the name CertAdmin. Regardless, of what name you will choose, you will want to note it, so you don’t lock yourself out by forgetting the account name you need to log in with.
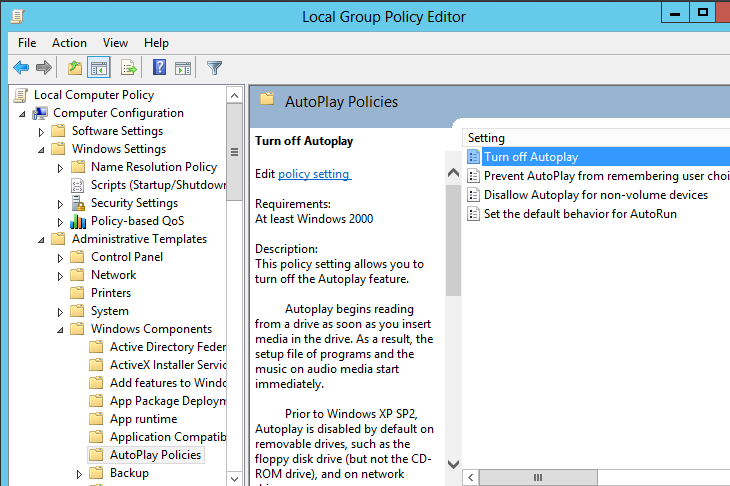
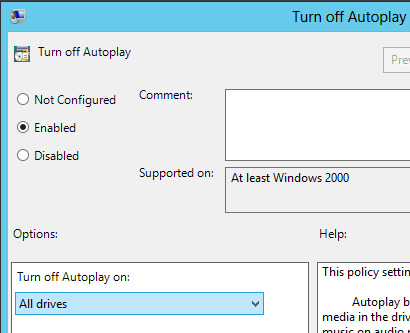
Disabling AutoPlay
Disabling AutoPlay is to protect against someone mounting a USB stick or CD-ROM and using Autoplay to launch malicious code. To Disable Autoplay, open GPEDIT.MSC, and expand Computer Configuration > Windows Settings > Security Settings > Local Policies > Security Options. Then double-click on Turn Off Autoplay. Although it may seem counterintuitive, choose Enabled and click OK.
Although it may seem counterintuitive, choose Enabled and click OK
Security Considerations for an Issuing CA
The security considerations for a online CA are slightly different than for an offline CA. For one on an Offline Root CA the best practice is to install Service Packs to maintain supportability. However for an Offline Root CA, we don’t expect security updates to be regularly applied. This is because the CA is offline and therefore not exposed to network based attacks. An Issuing CA has to be online by the nature of it’s role of issuing end-entity certificates. So, for an Issuing CA, security updates should be applied on a regular basis.
An Issuing CA that uses Certificate Templates is called an Enterprise CA, in Microsoft terminology. Enterprise CAs must be joined to a domain. Therefore there are going to be a lot of user potentially (think Domain Admins) that will have administrator privileges on the CA. So, you may definitely want to consider reducing the number of Administrators.
Also, for Domain Joined CAs, they get Group Policy applied so most of the configuration for these CAs are going to come from GP. So, although we are going to configure settings similar to what is configured on the Root CA, we would do this through Group Policy and not through Local Group Policy.
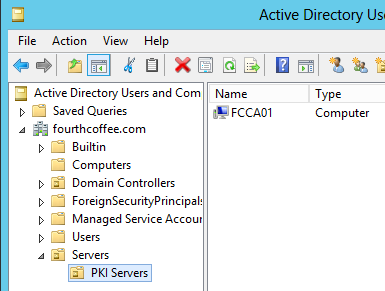
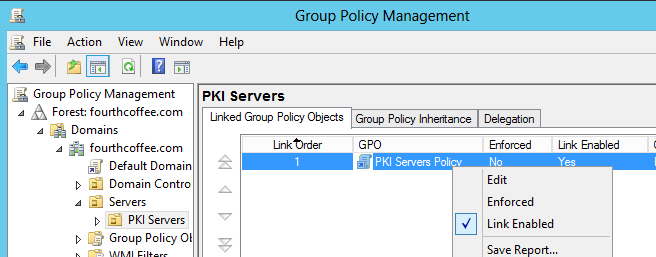
OU Structure
To be able to better manage your Enterprise CAs, it is a good idea to place them in their own OU. In my example below, I placed my Issuing CA in a PKI Servers OU, that is underneath my Servers OU.
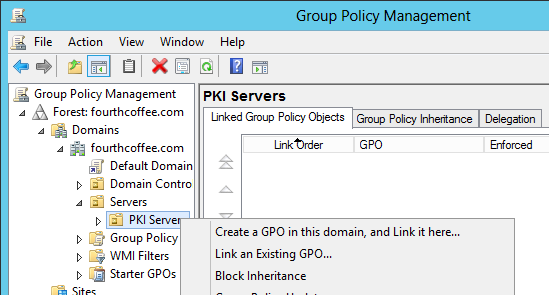
Group Policy
Now, if I want to apply specific settings to my CAs I can right click on the OU in GPMC.MSC and select Create a GPO in this domain, and Link it here…
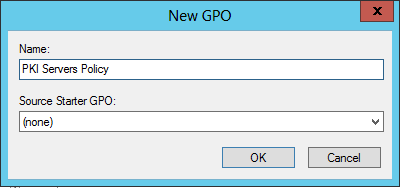
Next I give the Group Policy a name and click OK.
Now that the GPO has been created, I right click on the GPO and select Edit.
In that GPO I would run the same steps I ran in the previous section for these settings:
- Enable auditing for Object Access
- Disabling displaying the last logged on user
- Renaming the Administrator Account
- Disabling AutoPlay
So, please refer to the previous section on steps on how to deploy these settings. Keep in mind that some of these settings may already be deployed through some of your existing GPOs.
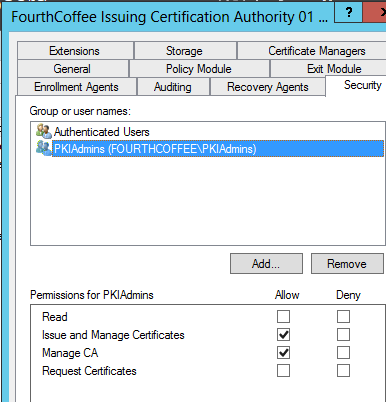
Management Permissions
As I stated previously it would be a good idea to restrict who has Administrator privileges on the CA. Additionally, you will want to limit what users have Manage CA permissions to the CA. To restrict Manage CA permission, you would follow the following steps.
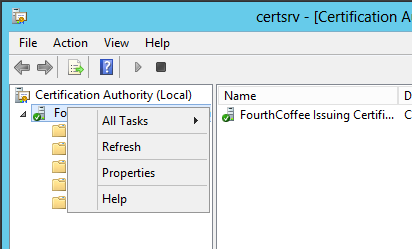
In the Certification Authority console (certsrv.msc), right-click on the CA Name. Select Properties form the context menu.
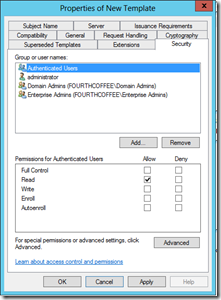
At this point you have a number of default groups listed. By default, Domain Admins, Enterprise Admins, and Local Administrators all have Manage CA permissions to the CA.
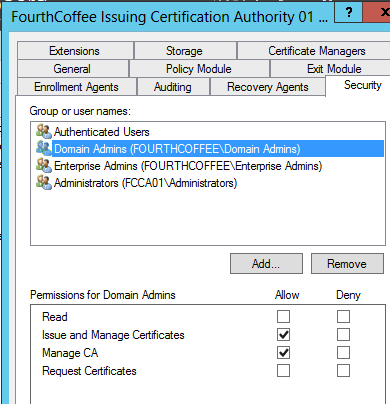
Regardless of how you configure this, you will want to leave Authenticated Users and leave them with Request Certificates permission. There are a few exceptions to this, but these exceptions are very rare. In my example I am leaving Authenticated Users with their default permission, removing all other groups, and adding my own group PKIADMINS. I have give the PKIADMINS group Issue and Manage Certificates and Mange CA permissions. I will then only add the appropriate individuals to the PKIADMINS group
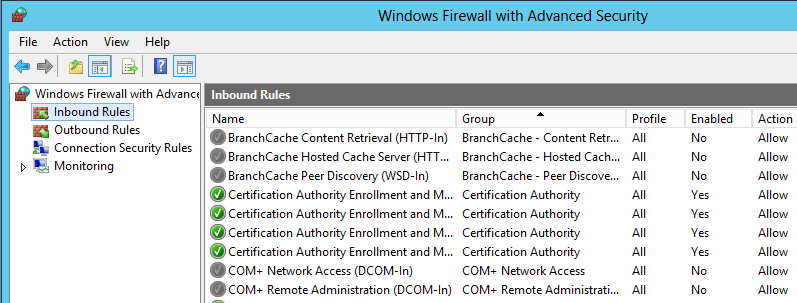
Windows Firewall
It is recommended that the Windows Firewall is enabled on Certification Authorities to reduce the attack surface.
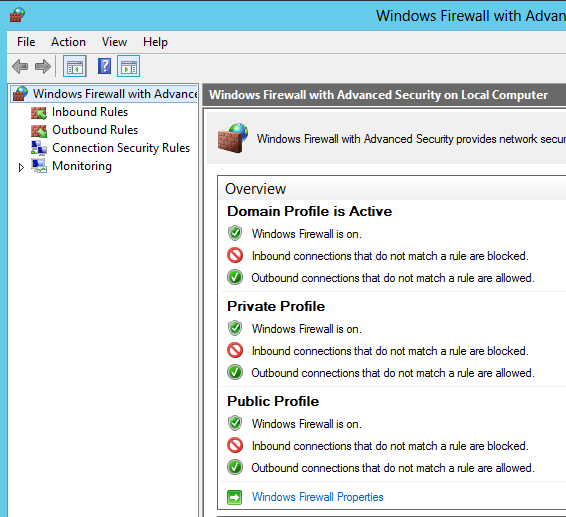
If you enable the Windows Firewall on the CA it will create the necessary exceptions for the Certification Authority as seen below.
Conclusion
So. I covered some basic security configuration you would want to preform on your Certification Authorities. There still are some outstanding issues I didn’t cover here. Some of those outstanding items would be configuring Role Separation as well as Monitoring. These two topics however, are worthy of their own blog posts, so I will cover these in the future. In the next section I will configuring High Availability for the HTTP AIA and CDP Repositories.
-Chris